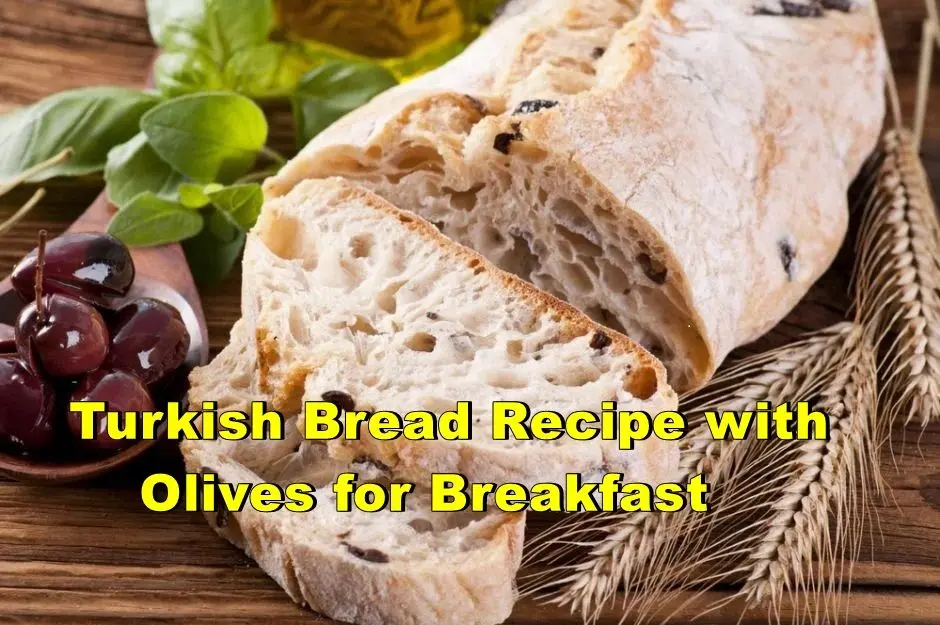
Turkish Olive Bread Recipe is a delicious way to bring the flavors of traditional Turkish bakeries into your own kitchen. Known as Zeytinli Ekmek, this rustic bread combines a soft, airy crumb with flavorful olives, extra virgin olive oil, and aromatic herbs that are widely enjoyed throughout Turkey, especially in the Aegean and Mediterranean regions. Unlike many Mediterranean olive breads, the Turkish version focuses on a light, chewy texture and the natural taste of quality olives rather than heavy seasonings. This detailed recipe explains every ingredient, technique, and baking tip, making it easy to bake authentic Turkish olive bread successfully at home.
What Is Turkish Olive Bread?
Turkish Olive Bread, known as Zeytinli Ekmek, is a traditional savory bread prepared with olives, olive oil, flour, yeast, and simple pantry ingredients. It is especially popular in western Turkey, where olive cultivation has shaped local cuisine for centuries. Freshly baked loaves are commonly enjoyed for breakfast, afternoon tea, or alongside soups and meze dishes.
Unlike Italian olive bread or French olive loaves, Turkish olive bread has a lighter crumb, a thinner crust, and a more delicate balance of flavors. The olives remain the star ingredient, while herbs and spices are used sparingly to preserve the bread’s authentic character.
Today, many Turkish families bake this bread at home because it requires only basic ingredients and pairs well with a wide variety of meals. Whether served warm from the oven or toasted the next day, it remains one of the most versatile breads in Turkish home cooking.
Why You’ll Love This Recipe
- Authentic Turkish bakery-style flavor.
- Soft interior with a lightly crisp crust.
- Made with simple ingredients available worldwide.
- Perfect for breakfast, sandwiches, or meze platters.
- Detailed instructions suitable for beginners.
- Traditional recipe adapted for modern home ovens.
- Includes ingredient substitutions for international readers.
Ingredients
- 500 g (4 cups) bread flour
- 320 ml (1⅓ cups) lukewarm water
- 7 g instant dry yeast
- 1½ teaspoons salt
- 2 tablespoons extra virgin olive oil
- 180 g pitted black olives, roughly chopped
- 1 teaspoon dried thyme (optional but traditional in some regions)
- 1 teaspoon sesame seeds for topping (optional)
This recipe keeps the ingredient list intentionally simple so the natural flavor of the olives remains the highlight. High-quality olives and good olive oil make a noticeable difference in the final result.
Ingredient Notes & International Substitutions
Bread Flour
Bread flour produces the chewy texture that characterizes traditional Turkish bakery bread. If bread flour is unavailable, all-purpose flour can be used, although the loaf will be slightly softer.
Olives
Traditional recipes often use naturally cured Turkish black olives from the Aegean region. If these are unavailable, Kalamata olives or other naturally fermented black olives make excellent substitutes. Avoid canned olives packed in heavily seasoned brine, as they can overpower the bread’s flavor.
Olive Oil
Use good-quality extra virgin olive oil for both flavor and texture. Mild fruity olive oils work particularly well because they complement the olives without becoming bitter during baking.
Yeast
Instant yeast offers reliable results for home bakers. Active dry yeast can also be used but should first be dissolved in the lukewarm water according to the manufacturer’s instructions.
Optional Herbs
Some regional recipes include a small amount of dried thyme or oregano, while others rely entirely on the flavor of the olives. Both methods are authentic, so you can adjust the seasoning to your preference.
Equipment You’ll Need
- Large mixing bowl
- Kitchen scale for accurate measurements
- Dough scraper
- Stand mixer (optional)
- Baking tray or Dutch oven
- Parchment paper
- Cooling rack
Although a Dutch oven creates exceptional oven spring and a beautifully crisp crust, a standard baking tray works perfectly for this traditional recipe when preheated properly.
For readers interested in the health benefits of olives and olive oil, the Mediterranean Diet Foundation offers reliable information about their role in the Mediterranean diet.
How to Make Turkish Olive Bread Recipe Step by Step
Although Turkish Olive Bread uses simple ingredients, the quality of the dough and the fermentation process determine the final texture. Allowing the dough enough time to rise creates the soft, airy crumb that makes this traditional bread different from denser Mediterranean olive loaves. Follow these steps carefully for bakery-style results at home.
Step 1 – Activate the Yeast
If you’re using instant yeast, simply combine it with the flour. If you’re using active dry yeast, dissolve it in the lukewarm water and let it stand for 5–10 minutes until it becomes foamy.
The water should feel warm but not hot, ideally between 35–38°C (95–100°F). Hot water can kill the yeast, while cold water slows fermentation significantly.
Step 2 – Prepare the Dough
Combine the flour and salt in a large bowl. Gradually add the water and olive oil while mixing until a shaggy dough forms. Continue kneading for about 8–10 minutes by hand, or 6–7 minutes in a stand mixer, until the dough becomes smooth, elastic, and slightly tacky.
A properly kneaded dough should stretch without tearing easily. This gluten development helps create the light, chewy texture that authentic Turkish breads are known for.
Step 3 – Add the Olives
Pat the chopped olives dry with paper towels before adding them to the dough. Removing excess moisture prevents the dough from becoming sticky and helps distribute the olives more evenly.
Gently fold the olives into the dough during the final minute of kneading. Avoid overmixing, as this may crush the olives and discolor the dough.
Step 4 – First Rise
Shape the dough into a ball and place it in a lightly oiled bowl. Cover with a clean kitchen towel or plastic wrap and leave it in a warm, draft-free place for 60–90 minutes, or until it has doubled in size.
The exact rising time depends on the room temperature. During cooler months, fermentation may take slightly longer.
Step 5 – Shape the Loaf
Transfer the risen dough onto a lightly floured surface and gently press out the largest air bubbles. Shape it into a round or oval loaf without overworking the dough.
Place the loaf on parchment paper or into a lightly floured proofing basket if you plan to bake it in a Dutch oven.
Step 6 – Second Rise
Cover the shaped loaf loosely and allow it to rise again for about 35–45 minutes. During this second proof, the dough relaxes and develops a lighter texture after baking.
Meanwhile, preheat your oven to 220°C (425°F). If using a Dutch oven, place it inside the oven while it preheats.
Step 7 – Score and Bake
Using a sharp bread lame or knife, make one or two shallow slashes across the top of the loaf. Scoring allows the bread to expand evenly during baking and gives it its traditional artisan appearance.
Bake for 35–40 minutes, or until the crust is deep golden brown and the loaf sounds hollow when tapped on the bottom. If using a Dutch oven, bake covered for the first 25 minutes, then uncover for the remaining time to develop a crisp crust.
Step 8 – Cool Before Slicing
Transfer the bread to a cooling rack and allow it to cool for at least 30 minutes. Although it’s tempting to slice it immediately, waiting allows the crumb to finish setting and prevents the bread from becoming gummy.
Serve warm, at room temperature, or lightly toasted the next day.
Expert Baking Tips
- Use naturally cured olives instead of canned olives for a richer, more authentic flavor.
- Pat the olives dry before adding them to the dough to prevent excess moisture.
- Weigh your ingredients using a kitchen scale for consistent results.
- Don’t rush the fermentation—slow rising develops better flavor and texture.
- Steam during the first part of baking helps create a crisp, golden crust.
- Brush the loaf lightly with olive oil immediately after baking for a softer, more aromatic crust.
- Allow the bread to cool completely before storing to prevent condensation.
Common Mistakes to Avoid
- Adding wet olives directly to the dough.
- Using too much flour while kneading, resulting in a dry loaf.
- Skipping the second rise.
- Under-kneading the dough.
- Baking before the oven is fully preheated.
- Cutting the bread while it’s still hot.
- Using low-quality olive oil, which noticeably affects the final flavor.
Serving Suggestions
Turkish Olive Bread is incredibly versatile and can be enjoyed throughout the day. It is traditionally served warm at breakfast with Turkish cheeses, tomatoes, cucumbers, olives, and freshly brewed tea. Its soft crumb also makes it ideal for sandwiches or as part of a Mediterranean-style brunch.
For lunch or dinner, serve slices alongside lentil soup, white bean stew, grilled vegetables, or a selection of Turkish meze. The mild olive flavor complements both light vegetable dishes and hearty meat-based meals without overpowering them.
Lightly toasted leftovers are excellent with butter, cream cheese, or a drizzle of extra virgin olive oil, making this bread just as enjoyable the next day.
How to Store and Reheat Turkish Olive Bread
Turkish Olive Bread is at its absolute best on the day it is baked, when the crust is lightly crisp and the crumb is soft and airy. Fortunately, it also stores well, making it a practical bread to prepare in advance for breakfasts, light lunches, or family meals.
Room Temperature
Allow the bread to cool completely before storing. Wrap it in a clean kitchen towel or place it inside a bread box or airtight container. Properly stored, it will stay fresh for up to 2 days at room temperature.
Avoid sealing warm bread in plastic bags, as trapped moisture softens the crust and may cause condensation.
Refrigerator
Although refrigeration is possible, it is generally not recommended because bread tends to stale more quickly in the refrigerator. If necessary, store it in an airtight container for up to 5 days.
Freezer
Turkish Olive Bread freezes exceptionally well. Slice the loaf before freezing so individual portions can be thawed as needed. Wrap each slice tightly in plastic wrap and place them inside a freezer-safe bag.
The bread maintains excellent quality for up to 3 months.
Best Reheating Methods
- Oven: Bake at 180°C (350°F) for 8–10 minutes.
- Air Fryer: Heat at 170°C (340°F) for 3–4 minutes.
- Toaster: Ideal for individual slices.
- Microwave: Suitable for quick reheating, although the crust will become softer.
For the closest texture to freshly baked bread, reheating in the oven is the best option.
Frequently Asked Questions
Can I use green olives instead of black olives?
Yes. Green olives produce a slightly brighter and tangier flavor, while black olives create the more traditional taste commonly found in Turkish bakeries. Both are authentic, so the choice depends on personal preference.
What type of olives work best?
Naturally cured olives with firm flesh provide the best flavor and texture. If your olives are packed in brine, drain and dry them thoroughly before mixing them into the dough.
Can I prepare the dough the night before?
Absolutely. After kneading, cover the dough and let it rise slowly overnight in the refrigerator. The longer fermentation develops a deeper flavor and often produces an even lighter crumb.
Why did my bread become dense?
Dense bread is usually caused by under-kneading, insufficient proofing time, expired yeast, or adding too much flour during kneading. Measuring ingredients accurately and allowing enough rising time usually solves the problem.
Can I make this recipe without a stand mixer?
Yes. Turkish Olive Bread has traditionally been mixed and kneaded entirely by hand. A stand mixer simply saves time but is not necessary for excellent results.
Can I add cheese to the dough?
Yes. Many home cooks add small cubes of Turkish white cheese (Beyaz Peynir) or feta-style cheese. Keep the quantity moderate so the olives remain the dominant flavor.
Can I use whole wheat flour?
You can replace up to one-third of the bread flour with whole wheat flour for a nuttier flavor. Using more may produce a denser loaf unless additional water is added.
What makes Turkish Olive Bread different from other olive breads?
Turkish Olive Bread focuses on the natural flavor of olives and olive oil rather than large amounts of herbs or cheese. It has a softer crumb, a lighter crust, and is traditionally served as part of breakfast or alongside homemade Turkish dishes instead of being eaten as a standalone loaf.
Conclusion
Authentic Turkish Olive Bread is a simple homemade bread that showcases the rich flavors of Turkey’s olive-growing regions. With its soft interior, crisp crust, and naturally savory taste, it is perfect for breakfast, family meals, sandwiches, or serving alongside soups and traditional Turkish dishes. Once you bake it from scratch, you’ll understand why it remains a favorite in Turkish homes and neighborhood bakeries.
Looking for more authentic Turkish baking recipes? Continue exploring the traditional breads, pastries, and regional specialties on TurkishDishes.net to discover more homemade recipes inspired by Turkey’s rich culinary heritage.
Authentic Turkish Olive Bread Recipe (Zeytinli Ekmek)
Ingredients
- 500 g bread flour
- 320 ml lukewarm water
- 7 g instant dry yeast
- 1½ teaspoons salt
- 2 tablespoons extra virgin olive oil
- 180 g pitted black olives roughly chopped and dried
- 1 teaspoon dried thyme optional
- 1 teaspoon sesame seeds optional for topping
Instructions
- If using instant yeast, mix it directly with the flour. If using active dry yeast, dissolve it in lukewarm water for 5–10 minutes until foamy.
- In a large bowl, combine bread flour and salt. Add lukewarm water and olive oil gradually, mixing until a shaggy dough forms.
- Knead by hand for 8–10 minutes, or in a stand mixer for 6–7 minutes, until the dough becomes smooth, elastic, and slightly tacky.
- Pat the chopped olives dry with paper towels. Gently fold them into the dough during the final minute of kneading.
- Place the dough in a lightly oiled bowl, cover, and let it rise in a warm place for 60–90 minutes, or until doubled in size.
- Transfer the dough to a lightly floured surface. Gently press out large air bubbles and shape it into a round or oval loaf.
- Place the loaf on parchment paper, cover loosely, and let it rise again for 35–45 minutes.
- Preheat the oven to 220°C / 425°F. If using a Dutch oven, preheat it inside the oven.
- Score the top of the loaf with a sharp knife or bread lame.
- Bake for 35–40 minutes until deeply golden and hollow-sounding when tapped. If using a Dutch oven, bake covered for 25 minutes, then uncovered until browned.
- Transfer to a cooling rack and let the bread cool for at least 30 minutes before slicing.
Notes
Dry the olives well before adding them to the dough.
Do not add too much flour while kneading; the dough should remain slightly tacky.
For deeper flavor, refrigerate the dough overnight after kneading.
Let the bread cool before slicing to avoid a gummy crumb.
There is no mention of the amount of flour!